Troubleshooting Common Tire Inflator Problems: A Comprehensive Guide
Maintaining proper tire pressure is not just a matter of vehicle maintenance; it’s a critical aspect of driving safety and efficiency. Correct tire inflation ensures optimal tire contact with the road, leading to improved handling, reduced tire wear, and better fuel economy. Conversely, underinflated tires can result in decreased control over the vehicle, increased stopping distances, and a higher risk of tire failure. Similarly, overinflated tires can lead to a harsher ride and an increased chance of damage from road debris.Despite the clear benefits of keeping tires properly inflated, vehicle owners often encounter issues with tire inflators, the tools essential for this task. Common problems range from inflators not turning on, failing to reach the desired pressure, to hoses leaking or becoming damaged over time. These issues can frustrate drivers and potentially leave them stranded with improperly inflated tires, highlighting the importance of understanding how to troubleshoot and resolve common tire inflator problems effectively. This guide aims to equip vehicle owners with the knowledge to address these challenges, ensuring their tire inflators remain reliable tools for maintaining tire pressure.
Understanding Tire Inflators
Tire inflators are essential tools for maintaining the correct air pressure in vehicle tires, which is vital for optimal vehicle performance, safety, and fuel efficiency. There are several types of tire inflators, each with its own operation mechanism and power source. Understanding these can help you choose the right inflator for your needs and ensure you use it correctly.
Types of Tire Inflators
- Manual Tire Inflators: These inflators require physical effort from the user to operate. They typically use a piston and cylinder mechanism where the user pumps the handle to compress air and force it into the tire.
- Electric Tire Inflators: These are powered by an electric motor and can be plugged into a wall socket or the car’s 12V power outlet. They are convenient and eliminate the need for manual labor.
- Battery-Powered Tire Inflators: These inflators use rechargeable batteries, offering the advantage of portability since they don’t need to be connected to a power source while in use.
Basic Operation Principles
Regardless of the type, the basic operation principle of a tire inflator involves drawing in air, compressing it, and then directing it into the tire to achieve the desired pressure. Here’s a general breakdown of the components and their functions:
- Power Source: The inflator is powered either manually, by an electric motor, or by a battery. The power source determines how the user operates the inflator and how portable it is.
- Switch: This activates the motor in electric and battery-powered inflators, turning the device on and off.
- Electric Motor: In electric and battery-powered inflators, the motor’s output shaft is connected to gears that transfer energy to the piston, or in some cases, directly to a fan that cools down the device.
- Gears: These are present in most tire inflators and are responsible for transferring the motion from the motor to the piston.
- Piston and Cylinder: The piston is crucial in the mechanism of the tire inflator. As the gears turn, the piston moves up and down, drawing air into the cylinder and then compressing it. The compressed air is then pushed through a connecting tube into the tire.
- Fan: Many tire inflators include a built-in fan to cool the device during operation, especially important for electric models to prevent overheating.
- Valves: Valves control the airflow into the cylinder and are essential for the proper functioning of the inflator.
- Pressure Sensor: Some tire inflators come equipped with a pressure sensor that reads the tire pressure and displays it on a digital gauge. This sensor can also control a valve automatically, allowing for convenient automatic closing when the desired pressure level is reached.
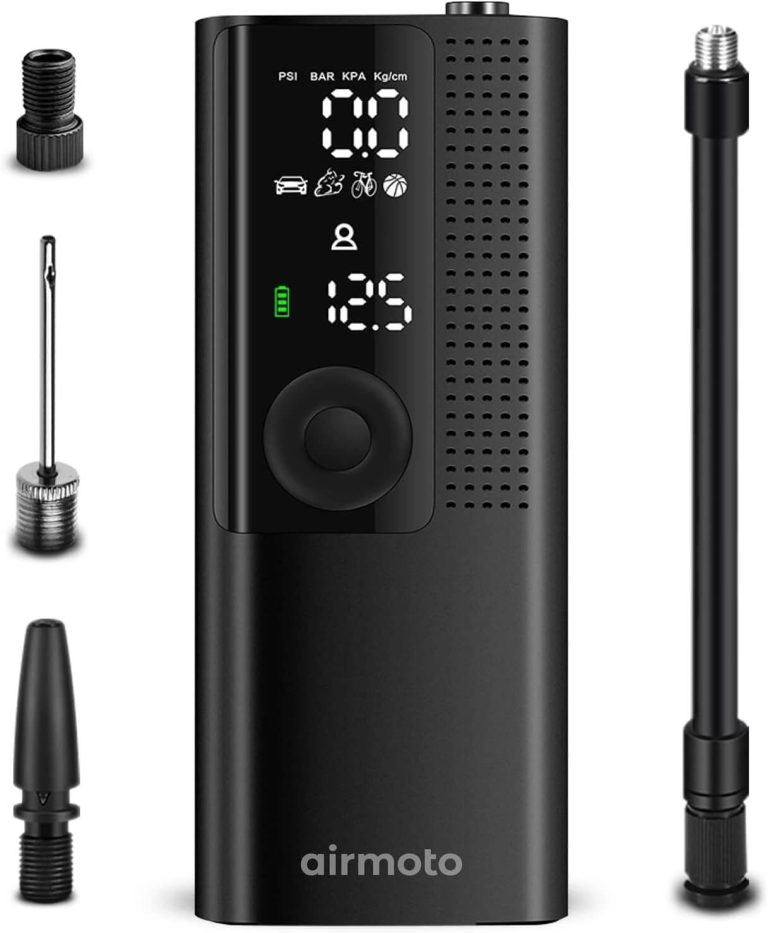
- Connector: This is the tubing at the end of the tire inflator that links the inflator to the tire. It is typically made of rubber and may be covered with a fabric wrap for protection. Modern models often include various tips that can be attached to the connector for inflating different items.
Understanding these types and principles can help you select and operate a tire inflator that best suits your needs, whether for routine tire maintenance or emergency situations.

Common Problems and Solutions
When facing the issue of a tire inflator not turning on, there are a couple of fundamental steps you can take to troubleshoot the problem. Here’s a more detailed look at the common solutions:
Check Power Source
- For Electric Inflators: Ensure that the inflator is properly connected to a power source. If it’s designed to plug into a wall socket (110-Volt AC), check that the outlet is functioning by testing it with another device. If it’s meant to be powered by the car’s 12-volt power outlet, ensure that the vehicle’s ignition is turned to the “on” or “accessory” position to provide power to the outlet.
- For Battery-Powered Inflators: If the inflator is battery-powered, the battery may need to be recharged or replaced. Check the battery’s charge level, and if it’s low, recharge it according to the manufacturer’s instructions. If the battery does not hold a charge, it may need to be replaced.
Inspect Fuses
- Inflator Fuse: Some tire inflators have an internal fuse that may blow if the unit draws too much current or if there is a short circuit within the inflator. Inspect the fuse and replace it if necessary. The fuse is typically located in the plug that goes into the 12-volt power outlet or within the inflator itself.
- Vehicle’s Fuse Box: If the inflator is not turning on when plugged into the car’s power outlet, check the vehicle’s fuse box for a blown fuse. The owner’s manual can help you locate the fuse box and identify the specific fuse for the 12-volt power outlets. Replace any blown fuses with ones of the correct amperage.
By ensuring that the power source is functioning correctly and that all fuses are intact, you can often resolve the issue of a tire inflator not turning on. If these steps do not fix the problem, the inflator may have a more complex issue that requires professional repair or replacement.
Inadequate Pressure Build-Up
When dealing with inadequate pressure build-up in tire inflators, two common issues often arise: leaky connections and overheating. Addressing these problems promptly can ensure your tire inflator operates efficiently and safely.
Leaky Connections
A secure connection between the inflator hose and the tire valve is crucial for effective tire inflation. If the connection is not tight or if there’s damage to the hose or valve, air can escape during inflation, leading to inadequate pressure build-up. To troubleshoot this issue:
- Inspect the Hose and Valve: Check for any visible signs of wear, tear, or damage on the inflator hose and tire valve. Cracks, holes, or fraying on the hose can lead to air leakage.
- Ensure a Tight Seal: When connecting the inflator hose to the tire valve, make sure the connection is secure. For screw-on connectors, ensure they are tightly screwed onto the valve. For quick-connectors, ensure they are properly engaged and locked in place.
- Replace Damaged Components: If you find any damage to the hose, connectors, or tire valve, replace these components before attempting to inflate the tire again. Using damaged parts can not only lead to inadequate inflation but also pose safety risks.
Overheating
Tire inflators, especially electric and battery-powered models, can overheat with prolonged use. Overheating can cause the inflator to automatically shut down as a safety measure to prevent damage to the unit or potential hazards. If your inflator overheats:
- Allow It to Cool: Turn off the inflator and let it cool down before attempting to use it again. Continuing to use an overheated inflator can lead to damage or failure of the unit.
- Check Ventilation: Ensure the inflator’s air vents are not blocked by debris or dust. Proper ventilation is essential for keeping the unit cool during operation.
- Limit Continuous Use: Avoid using the inflator for extended periods without breaks. Giving the inflator time to cool between uses can prevent overheating.
- Inspect for Mechanical Issues: Overheating can sometimes be a symptom of underlying mechanical issues, such as worn-out parts or insufficient lubrication in models that require it. Conduct a thorough inspection or consult a professional if overheating persists.
By addressing leaky connections and preventing overheating, you can ensure your tire inflator works effectively, maintaining proper tire pressure for safe and efficient driving.
Inflator Cannot Reach Desired PSI
When a tire inflator cannot reach the desired PSI, it may be due to power limitations or leaks in the tire or valve stem. Addressing these issues can help ensure your tire is properly inflated for safe and efficient driving.
Power Limitations
Portable tire inflators, while convenient and versatile, may have limitations in their ability to reach higher PSI levels, especially when compared to larger, stationary air compressors. This limitation is often due to their design, which prioritizes portability and ease of use over the high power output found in larger models.
- Assess Inflator Capability: Before attempting to inflate, ensure that your portable inflator is capable of reaching the required PSI for your tire. This information is typically found in the product specifications.
- Consider Inflator Type: Different types of portable inflators (e.g., handheld, console, corded, cordless) have varying capabilities. For instance, handheld inflators are generally faster at inflating tires than console compressors, but they may still struggle with very high PSI requirements.
- Battery-Powered Inflators: For battery-powered models, cold temperatures can affect battery efficiency and runtime, potentially limiting the inflator’s ability to reach high PSI levels. Ensure the battery is fully charged and consider keeping it warm before use in cold conditions.
Check for Leaks
Leaks in the tire or valve stem can prevent the tire from reaching the desired pressure, as air escapes as quickly as it is pumped in. Identifying and fixing leaks is crucial for effective tire inflation.
- Use Soapy Water: Apply soapy water to the tire, especially around the valve stem, and look for bubbles that indicate a leak. This simple method can quickly identify where air is escaping.
- Valve Stem Issues: If the leak is coming from the valve stem, it may be due to a faulty valve core or damage to the stem itself. Valve cores can often be tightened or replaced easily with a valve core tool. If the stem is damaged, it may require replacement.
- Tire Damage: Inspect the tire for any punctures, cuts, or damage that could be causing the leak. Temporary repairs, such as tire plugs or patches, can fix punctures, but more significant damage may require tire replacement.
By addressing power limitations and checking for leaks, you can troubleshoot issues with your tire inflator not reaching the desired PSI. Ensuring your inflator is suitable for your tire’s requirements and promptly fixing any leaks will help maintain proper tire pressure for safe and efficient driving.
Air Leaking from Valve
When air leaks from a tire valve, it’s often due to issues with the valve stem. A faulty valve stem can compromise the tire’s integrity, leading to decreased tire pressure, reduced fuel efficiency, and potentially unsafe driving conditions. Addressing a leaky valve stem promptly is crucial for maintaining your vehicle’s performance and safety. Here’s how to tackle this issue:
Identifying a Faulty Valve Stem
A leaky valve stem can sometimes be identified by a hissing sound as air escapes or by the presence of bubbles when soapy water is applied around the valve area. If air leakage is observed or suspected from the valve stem, it’s a clear indication that the valve stem may be faulty or damaged.
Replacing the Valve Stem
Replacing a valve stem is a straightforward process that can be done with a few tools and steps. Here’s a general guide based on the provided sources:
- Remove the Tire: Depending on the method, you may need to remove the tire from the vehicle to access the valve stem easily. However, some tools and techniques allow for valve stem replacement without removing the tire.
- Remove the Old Valve Stem: Once you have access to the valve stem, you can remove it by cutting it or pulling it out with pliers. Be cautious not to damage the wheel during this process.
- Prepare the New Valve Stem: Before installing the new valve stem, it’s recommended to lubricate it with a suitable substance (e.g., dish detergent or a specialized lubricant). This helps the valve stem slide into place more easily and creates a better seal once it dries.
- Install the New Valve Stem: Using a valve stem tool, insert the new valve stem into the hole in the wheel. Ensure it’s properly seated and secure. Tools specifically designed for valve stem installation can make this process easier and more efficient.
- Re-Inflate the Tire: Once the new valve stem is installed, re-inflate the tire to the manufacturer’s recommended pressure. Check for leaks by applying soapy water around the valve stem area again. No bubbles should form if the installation is successful.
- Check for Proper Sealing: After inflating the tire, it’s crucial to ensure that the new valve stem is not leaking. Observing the tire pressure over a few hours or days can help confirm that the issue has been resolved.
Replacing a faulty valve stem is a critical maintenance task that can prevent air leakage and maintain tire integrity. By following these steps and using the right tools, you can effectively address valve stem issues and ensure your tires remain properly inflated for safe and efficient driving.
Inflator Hose Problems
Inflator hose problems can significantly impact the functionality of your tire inflator. Regular inspection is crucial to identify any potential issues that could lead to inadequate performance or safety hazards. Here are steps to properly inspect your inflator hose and address any problems:
Hose Inspection
- Visual Inspection: Begin by visually examining the entire length of the hose. Look for any signs of wear such as cracks, cuts, abrasions, or any other visible damage that could compromise the hose’s integrity.
- Flexibility Check: Gently bend the hose in various places, especially near the connectors, to check for any stiffness or brittleness. A hose that has lost its flexibility may be prone to cracking or breaking.
- Check for Bulges: Inspect the hose for any bulges or soft spots, which can indicate weak areas where the hose may rupture under pressure.
- Connection Points: Examine the areas where the hose connects to the inflator and the tire valve. These are common points for potential leaks or damage due to frequent attachment and detachment.
- Leak Test: If you suspect a leak but cannot see any visible signs, you can perform a leak test by applying soapy water to the hose and connectors while the inflator is running. Bubbles will form at the site of a leak.
Addressing Hose Problems
- Replace Damaged Hoses: If you find any damage during the inspection, it’s best to replace the hose entirely. Continuing to use a damaged hose can lead to further problems and may even be unsafe.
- Choose Quality Replacements: When selecting a replacement hose, opt for one that is compatible with your inflator and is made from durable materials that can withstand the pressure and environmental conditions it will be exposed to.
- Proper Storage: To prevent future damage, store your hose properly by keeping it away from sharp objects, high traffic areas, and extreme temperatures. If possible, use a reel to keep the hose neatly coiled and protected.
By conducting regular inspections and promptly addressing any issues, you can ensure that your tire inflator hose remains in good working condition, providing reliable performance when you need to maintain your vehicle’s tire pressure.
Preventive Maintenance
Preventive maintenance is key to extending the life of your tire inflator and ensuring it functions correctly when you need it. Regular checks and proper storage are essential components of a good maintenance routine. Here’s how to implement these practices:
Regular Checks
- Inspect Before Use: Before each use, give your tire inflator a quick inspection to check for any signs of wear or damage. Look for frayed wires, damaged plugs, or corrosion on battery terminals in electric or battery-powered models.
- Check the Hose: As previously mentioned, regularly inspect the hose for cracks, wear, and tear. A compromised hose can lead to leaks and inefficient inflation.
- Test the Pressure Gauge: Ensure that the pressure gauge, whether analog or digital, is providing accurate readings. An inaccurate gauge can lead to improperly inflated tires, which can affect vehicle handling and fuel efficiency.
- Look for Corrosion: Check for any signs of rust or corrosion, particularly on metal parts. Corrosion can weaken the inflator and lead to failures.
Clean and Store Properly
- Cleaning: After each use, wipe down the inflator to remove any dirt, dust, or moisture. Keeping the inflator clean prevents the buildup of debris that could affect its operation.
- Dry Storage: Store your tire inflator in a dry place to prevent moisture from causing rust or electrical issues. If you have a battery-powered inflator, remove the battery before storage to prevent corrosion.
- Cool Environment: Avoid storing the inflator in places with extreme temperatures, as heat can damage electronic components and cold can affect battery performance. A cool, climate-controlled environment is ideal.
- Avoid Direct Sunlight: Prolonged exposure to sunlight can degrade the hose and plastic components of the inflator. Store the inflator away from direct sunlight.
- Proper Positioning: Store the inflator in a stable position to prevent it from falling or being knocked over, which could cause damage. If it comes with a carrying case, use it to protect the inflator during storage.
By performing regular checks and following proper cleaning and storage protocols, you can significantly reduce the likelihood of encountering problems with your tire inflator. This preventive approach not only ensures the longevity of the inflator but also contributes to your safety on the road by guaranteeing that your tires are always properly inflated.
Choosing the Right Tire Inflator
Choosing the right tire inflator is an important decision that can affect the ease of maintaining your vehicle’s tires and, by extension, your safety on the road. Here’s how to assess your needs and identify key features that will help you select the best tire inflator for your situation.
Assess Your Needs
- Vehicle Type: The type of vehicle you own will influence the kind of tire inflator you need. Larger vehicles, such as trucks and SUVs, typically require inflators that can deliver higher PSI levels.
- Tire Pressure Requirements: Check your vehicle’s owner manual or the tire placard attached to the door edge, doorpost, glove box door, or fuel door to find the recommended tire pressure for your vehicle. Ensure the inflator you choose can adequately meet these requirements.
- Usage Frequency: Consider how often you’ll be using the inflator. If you’ll be using it frequently or for multiple vehicles, you might want a more robust model that can handle regular use.
- Portability: If you plan to carry the inflator in your vehicle for emergencies, portability will be a key factor. Battery-powered or compact models are ideal for this purpose.
Features to Look For
- Auto-Shutoff: This feature allows you to set the desired PSI level, and the inflator will automatically shut off once it reaches that pressure. It’s a convenient feature that prevents over-inflation and ensures accuracy.
- Digital Gauge: A digital gauge provides a clear and precise reading of the tire pressure, which is easier to read than an analog gauge, especially in low-light conditions.
- LED Light: An LED light is a helpful feature for nighttime or low-light situations, allowing you to see the tire valve and the inflator’s gauge more clearly.
- Multiple Nozzle Attachments: Having a variety of nozzle attachments increases the inflator’s versatility, enabling you to inflate not just car tires but also bicycle tires, sports equipment, and other inflatable items.
- Power Source: Consider whether a corded model that plugs into your vehicle’s 12V outlet, a battery-powered model, or a manual pump best suits your needs for mobility and convenience.
- Duty Cycle: Check the duty cycle of the inflator, which is the amount of time it can operate continuously before needing a cool-down period. A longer duty cycle is beneficial for inflating multiple tires in one session.
- Build Quality: Look for a tire inflator with a sturdy construction and quality materials to ensure durability and longevity.
By carefully considering your specific needs and looking for these key features, you can choose a tire inflator that will provide reliable service, whether you’re at home or on the road. A well-chosen tire inflator becomes an invaluable tool for keeping your tires at the correct pressure, contributing to your vehicle’s performance and your safety.
Tire Inflator Keeps Blowing Car Fuse
If your tire inflator is blowing the car fuse, it indicates a problem that needs to be addressed to prevent damage to your vehicle’s electrical system. Here are some steps to troubleshoot and resolve the issue:
1. Check the Fuse Rating
- Correct Rating: Ensure that the fuse you are using is of the correct rating for the inflator. Refer to your vehicle’s owner manual to find the appropriate fuse rating for the accessory socket.
2. Inspect the Tire Inflator
- Damage Inspection: Look for any visible signs of damage on the inflator, including frayed wires, damaged plugs, or burnt components. Any visible damage can cause a short circuit.
- Internal Short: If the inflator has an internal short circuit, it will continuously blow fuses. This may require professional repair or replacement.
3. Check the Power Cord
- Cord Condition: Inspect the power cord for any kinks, frays, or breaks. A damaged power cord can cause a short circuit and blow fuses.
- Connection: Ensure that the connection to the vehicle’s power outlet is secure and free of debris.
4. Test with a Different Outlet
- Different Socket: Try using the inflator in a different power outlet or accessory socket in your vehicle. This can help determine if the problem is with the inflator or the specific socket.
5. Use a Different Inflator
- Alternative Inflator: If possible, try using a different tire inflator. If the new inflator works without blowing fuses, the original inflator is likely faulty.
6. Inspect Vehicle Wiring
- Wiring Issues: Check the vehicle’s wiring for any signs of damage or corrosion, particularly in the area where the inflator is plugged in. Damaged wiring can cause shorts that blow fuses.
7. Avoid Overloading Circuits
- Power Demand: Ensure that you are not using too many high-power devices simultaneously on the same circuit. This can overload the circuit and blow fuses.
8. Consult the Manual
- User Manual: Refer to the user manual for both the tire inflator and your vehicle for any specific instructions or warnings related to electrical use.
9. Contact Customer Support
- Manufacturer Help: If you suspect the inflator is defective, contact the manufacturer for assistance. They may offer repair options or a replacement if it is still under warranty.
10. Professional Help
- Automotive Technician: If you are unable to identify the problem, consider taking your vehicle to a qualified automotive technician. They can diagnose electrical issues safely and effectively.
Blowing fuses can indicate a serious electrical problem. It’s important to address this issue promptly to avoid further damage to your vehicle’s electrical system. Following these troubleshooting steps should help you identify and resolve the problem.
FAQs
How do I know if my tire inflator is not working properly?
Signs that your tire inflator may not be working properly include the inflator not turning on, failing to inflate to the desired PSI, making unusual noises, or overheating during use. Regularly inspecting your inflator for visible damage or leaks can also help identify issues.
What should I do if my tire inflator won’t turn on?
First, check the power source to ensure it’s properly connected. For electric models, verify that the outlet or vehicle’s 12V socket is functioning. For battery-powered inflators, ensure the battery is charged. Also, inspect any fuses related to the inflator or the vehicle’s power outlet.
Why is my tire inflator not inflating to the desired pressure?
This could be due to power limitations of the inflator, leaks in the tire or valve stem, or a damaged hose. Ensure your inflator is capable of reaching the required PSI for your tire, check for and repair any leaks, and inspect the hose for damage.
How can I prevent my tire inflator from overheating?
Avoid using the inflator continuously for extended periods. Allow it to cool down between uses, and ensure the air vents are not blocked by dust or debris. Overheating can be a sign of internal issues, so if it persists, professional inspection may be necessary.
Can I replace parts of my tire inflator, like the hose or valve?
Yes, parts such as the hose and valve can often be replaced. Ensure you purchase compatible replacements. For hoses, check for the correct length and fitting type. Valve replacements should match the specifications of your inflator model.
How often should I perform maintenance on my tire inflator?
Regular maintenance, including visual inspections and cleaning, should be performed based on the frequency of use. Even with infrequent use, a bi-annual check is recommended to ensure the inflator is in good working condition and to address any potential issues before they become problematic.
What are some essential maintenance tips for tire inflators?
Keep the inflator clean and dry, store it in a cool and dry place, regularly inspect the hose and connections for wear or damage, and test the inflator’s functionality periodically. Also, consider lubricating any moving parts if specified by the manufacturer. By addressing these common questions and concerns, vehicle owners can better understand how to use, troubleshoot, and maintain their tire inflators. This knowledge not only ensures the longevity of the inflator but also contributes to safer and more efficient driving through properly inflated tires.
Conclusion
In conclusion, addressing common tire inflator problems is not just about ensuring the functionality of a handy tool; it’s about maintaining vehicle safety, performance, and efficiency. Proper tire pressure is crucial for optimal driving conditions, reducing tire wear, and improving fuel economy. By understanding and troubleshooting issues such as power failures, inadequate pressure build-up, leaks, and hose damage, vehicle owners can ensure their tire inflators remain reliable and effective when needed most.